- This is a step-by-step guide on integrating Bankful into Shopify
- You will need a Username & Password for an active Bankful account to continue
- If you have not signed up for Bankful, please do so here
- We advise setting customer Email & Phone Number fields to mandatory within Shopify
- This will help your processing bank verify transactions and help with any future chargeback disputes
Integrating Bankful For Shopify
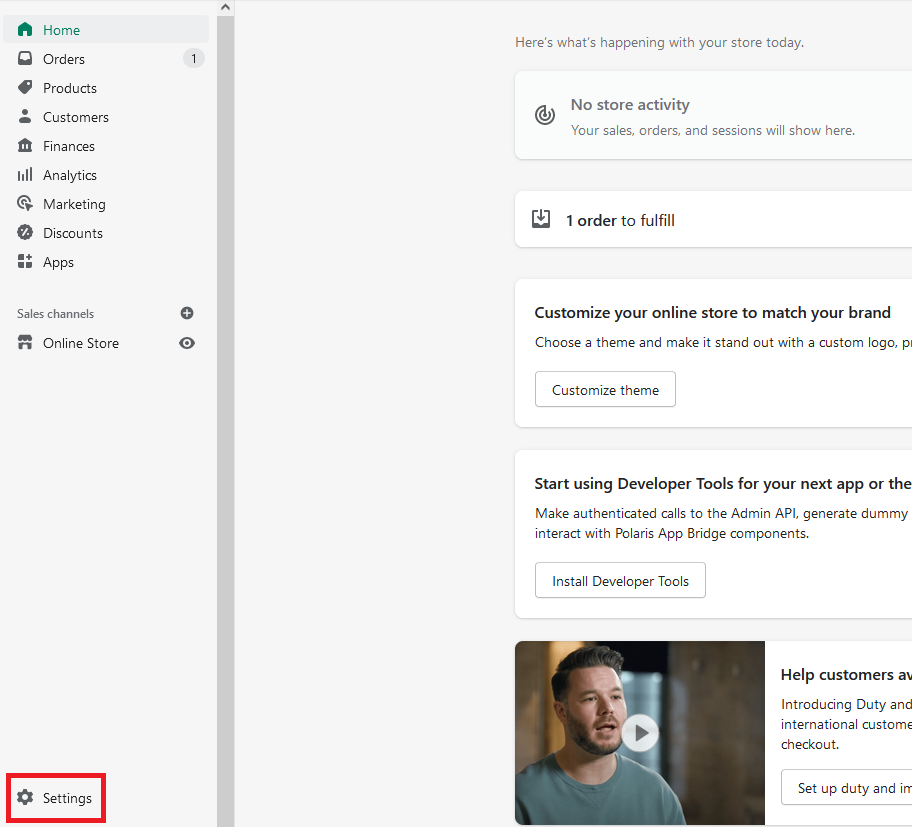
- Login to Shopify
- In the bottom left, click Settings
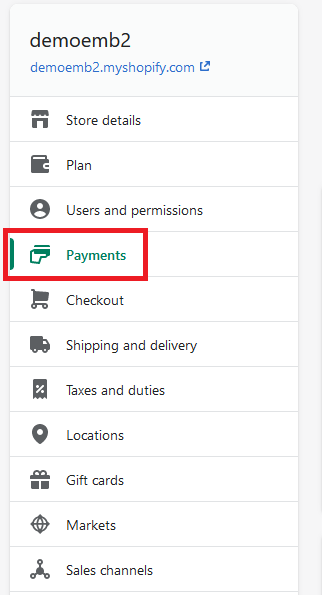
- Click on the Payments tab
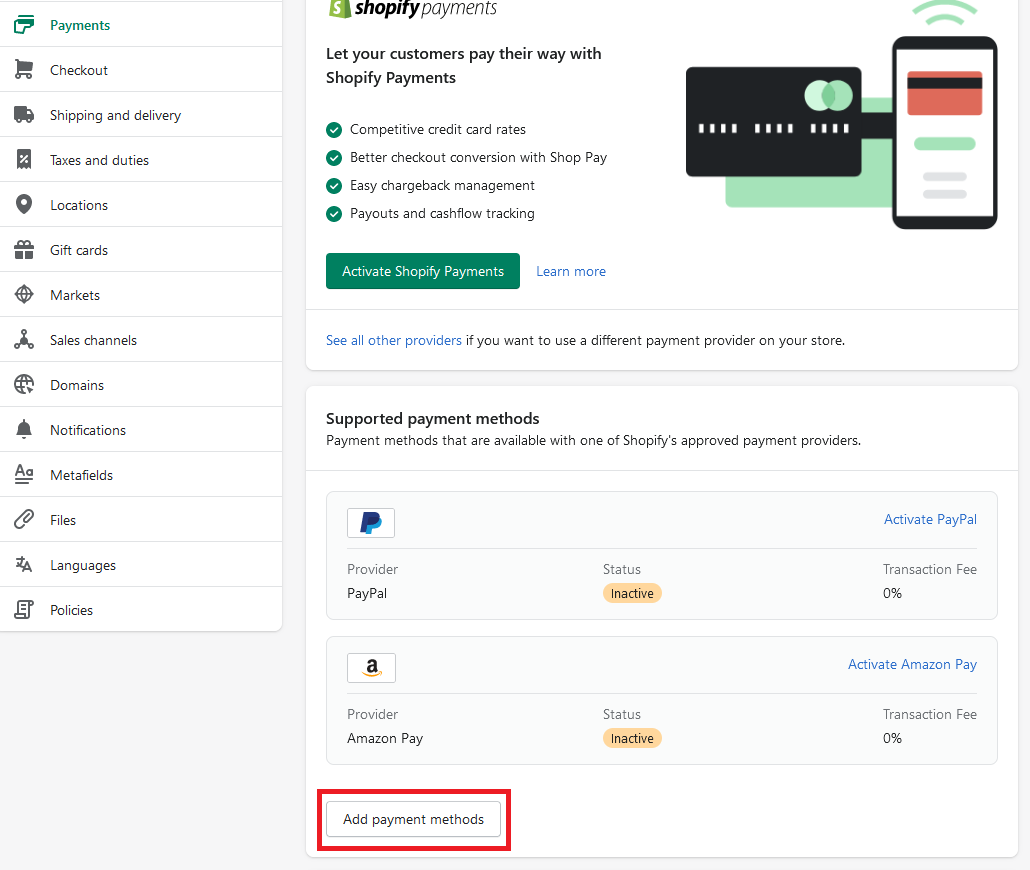
- Under the “Additional/Supported payment methods” section, click the Add payment methods button
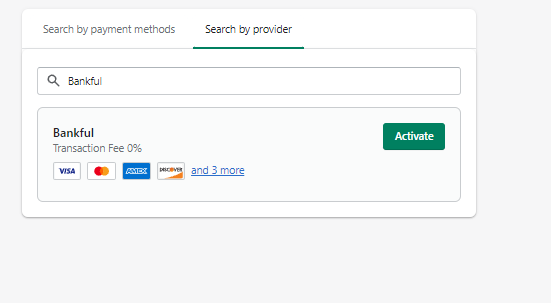
- Click on Search by provider
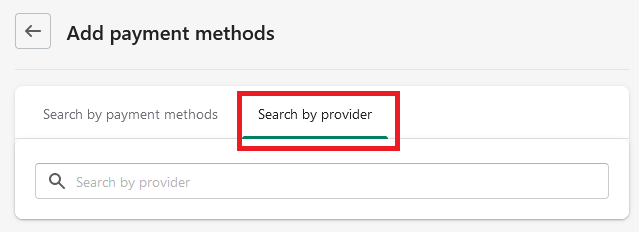
- Type in Bankful in to the search and then click Activate
- If Bankful does not load, you may use this link
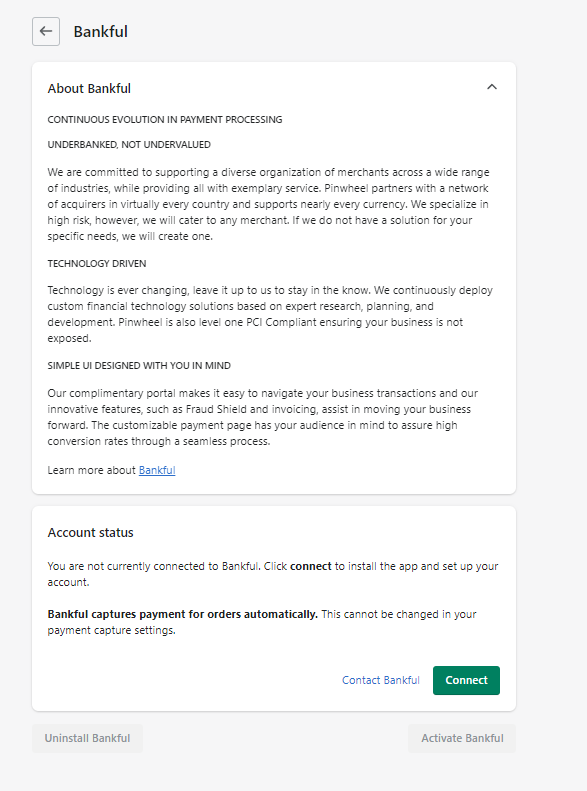
- Click Connect
- (This may sometimes say Manage instead)
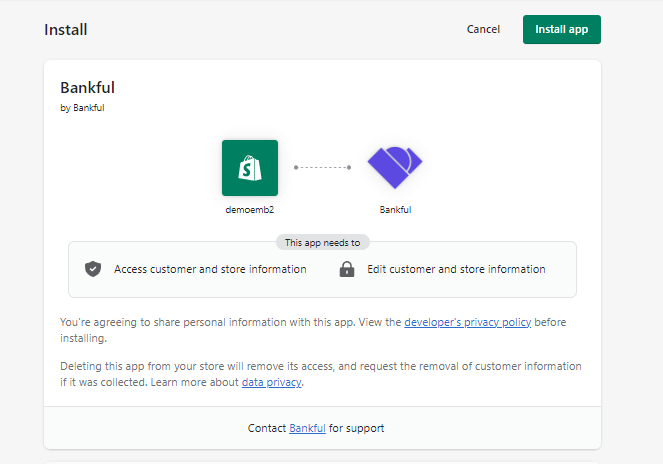
- Click Enable Bankful Payment Provider

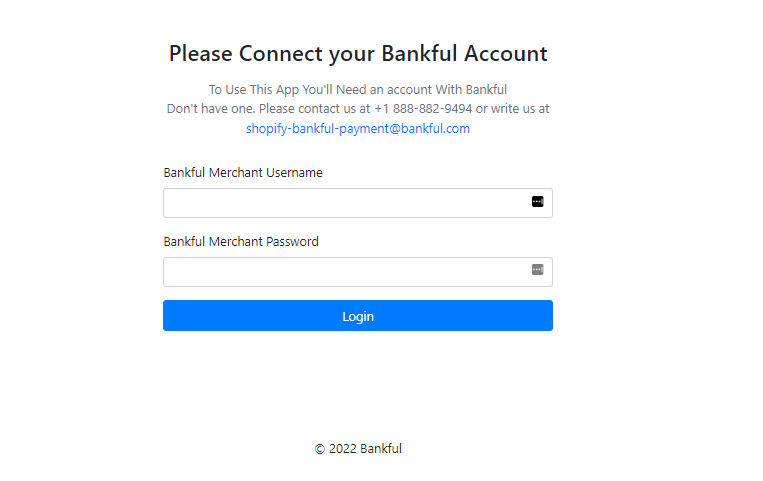
- Fill in your Bankful username and password then click Login
- If you have forgotten your password, you may use the Bankful Forgot Password feature
- If you continue to have issues, please reach out at support@bankful.com
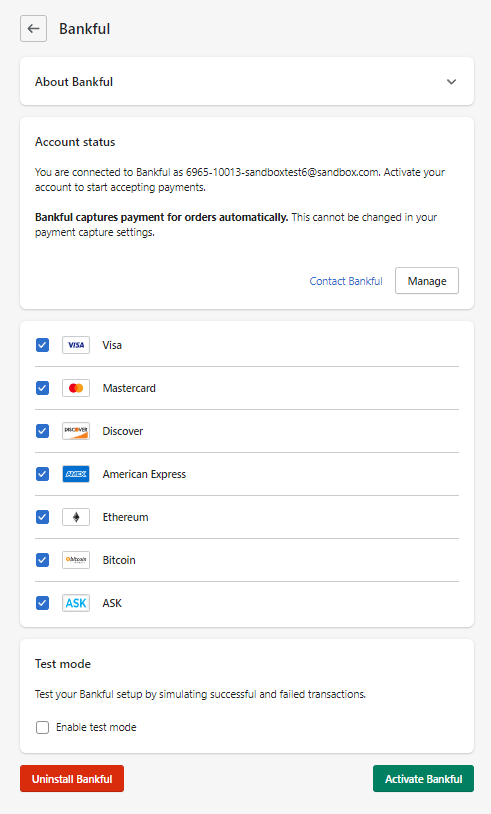
- Only check the thumbnails of the payments forms you are approved to transact with
- Selecting or deselecting these flags will not affect what you can you can actually accept
- NOTE: “Test mode” will not work. Transactions will process even if on Test mode
- Click Activate Bankful
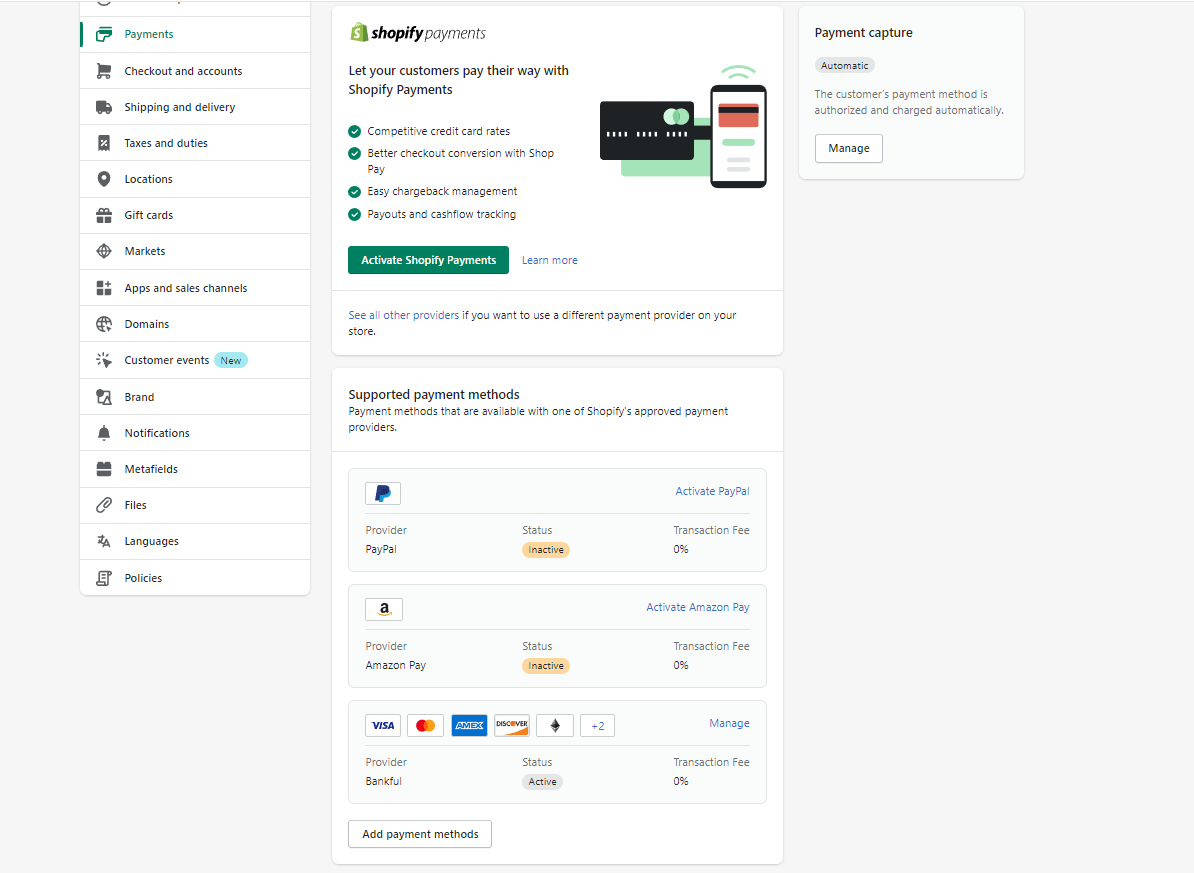
- Navigate back to your Payments tab
- You will see Bankful under the Additional/Supported payment methods section
Payment Capture
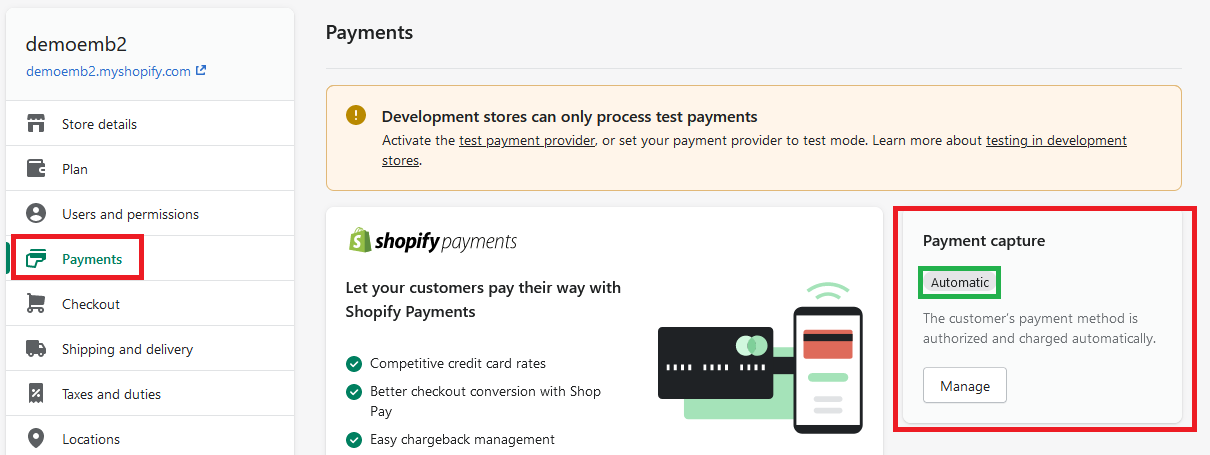
- Please ensure that Payment Capture in Shopify is set to Automatic
- Note: Payments will not process if Payment Capture is set to Manual
- Shopify > Settings > Payments > Payment Capture > Manage > set to Automatic
Tips & Recommendations
- You are now ready to accept payments!
- If you require any assistance please reach out to support@bankful.com